Friday, 6 July 2018

You Can Afford Your Homestead Dream… But You May Not Recognize it at First.

Do you dream of one day owning a homestead of your own, a place where you can raise animals and gardens to provide good, wholesome food for your family? No more city councils deciding if you can raise chickens or not. No more neighbors complaining about some animal or other of yours. The dream of owning your homestead need not remain a dream; it can become your reality.
There is a difference between owning a homestead and living a homestead life. People can buy a farm but that does not make them farmers. Your dream homestead also may not look anything like your dream when you first find it. I believe that being a homesteader means living the experience of creating that homestead. You get to design, build, fix, move, and adjust the homestead so that it works best for you. In doing so, you will become a part of that homestead and not just a property owner. The fulfillment of homesteading will come in the testimonies you give about overcoming the obstacles you faced and the home and life you created.
You can take all the great ideas you have been reading and talking about and put them to use on your very own homestead, once you finally have it. You don’t need to wait for some magical day to appear, or the perfect opportunity to fall into your lap. You can place yourself upon the path of homesteading opportunity now. You may have changed your perspective, shed some biases and possibly have the vision to see that diamond in the rough.
During the current economic downturn, affordable housing has not necessarily remained affordable for many. Job losses numbering in the hundreds of thousands each month give us cause to wonder if we can hold onto what we now have, much less wait long enough for that magical homestead. In harder times it is not uncommon to feel a greater desire for self-sufficiency as well as increased fear of the unknown. I believe that there is no better time to find that affordable homestead than the present.
Banks and lenders are fearful of foreclosing on high-risk loans already made. Property values in many areas continue to fall. Homeowners are unable to sell homes and new buyers are unable to get the loans they need. Thus the foreclosure cycle spins faster and faster.
By turning these negatives into advantages you can own your homestead now. Many rural areas that would suit a homestead well are littered with abandoned, run down or unkept mobile homes with land that would work perfectly well as a homestead for someone who can see the diamond in the rough.
I realize that a rundown “trailer” is not the object of your desire. Look past that mobile home and look at the land. What do you see? Is there room for the pasture you need? Is there room for gardens, crops, animals, a barn, a pond etc? As you gaze through the three-foot tall grass growing in and around the appliances that always seem to be left in the front yard, run through the list of characteristics you have dreamed your land would include. Chances are if you look for them, this forgotten and abused land has the potential for you to create them. Forget about the trailer for a moment and just picture your homestead sculpted into this land.
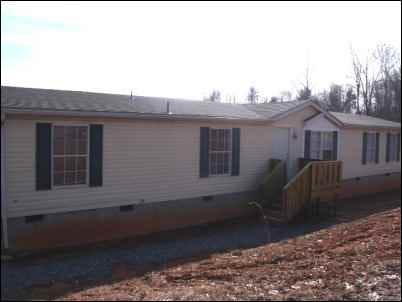
Now open your eyes and look at the ugly mobile home again. Chances are it is an old single-wide that looks terrible but looks can be deceiving. That old home probably has all the infrastructure in place that you need to start your homestead but previously could not afford to install yourself. That home probably has its own well, septic and electric already set up. You don’t have to keep the mobile home on that land. You can either have it moved or demolished (some areas do not allow old mobile homes to be moved). Once that home is gone, you can build or install the type of housing you prefer. If your newer home is more modern it might need an upgrade to the electric service but maybe not. So many articles and books are written today teaching how to use less power or how to create power that an upgrade may be totally unnecessary. Even if you go so far as to live totally off the grid, the available power during the construction of your homestead can make things much easier. Remember, you are carving your dream out of this clay and it will take work.
By discovering the potential for your homestead among the overgrown, forgotten land under that mobile home you have begun to polish that diamond. You are beginning to see the potential value but the owners and sellers of these properties only see an old, abandoned “trailer” on some forsaken land. This is your negotiating position of strength. Many of these properties have been foreclosed by banks and are now problem, non-performing assets known as Real Estate Owned (R.E.O’s) that the banks want, and need, to get off of their books. Potential sellers may own the property free and clear of any debt but have no idea on how to sell the property. They can’t find buyers with banks that are willing to finance this type of property. These owners will often consider about any suggestion to get rid of the property so that they can be free of paying the taxes.
If the property is free and clear of loans and liens then this seller may very well consider owner-financing the sale. They might consider a rent-to-own proposal or contract for deed. In many cases this type of arrangement might not require much, if any, cash up front since you are taking a property in such disrepair. Just be sure to set the purchase price and terms based upon the condition of the property as it now stands and not after you have done all the work improving it.
If you are buying the property from a bank that has completed the foreclosure then you will likely be making a bid or offer through a real estate agent. Not all agents like these types of properties so keep asking around until you find a good buyer’s agent (not the standard seller’s agent). You won’t be offering much and that means very little in sales commission for the agent but I have found that a good agent can learn a great deal from how we buy the property and what we do with it. This may even open up a new market niche for the agent. Don’t let any agent talk you into offering more money. Remember that this property is a bad asset as far as the bank is concerned. They don’t have any emotional attachment to the property and most likely have never even seen a picture of it. You need not be afraid of insulting a bank or your agent with a low offer.
It has been my experience that in many cases you can buy this property for less than the cost of installing the well, septic systems and electrical service. This means that if your offer is accepted, you will be receiving the land and home for free!
Offer as low as you like and see how the bank reacts. If they take your first offer, great, but I can tell you from experience, you will be kicking yourself for not having offered even less. If they counter your offer then up your offer a bit more but not too much. Stay within your budget. If you hardly have any budget at all then you won’t be overpaying! Keep your goals in mind and make that offer low. You can always walk away. You don’t have to buy but the banks and these types of owners need to sell.
Your offer should be contingent upon your inspection of the home and property no matter who is selling the property. Never take a seller’s word about a property. Do your own homework and bring along people you trust who know more than you to help you make certain this property can become the homestead you desire.
This due diligence homework cannot be stressed enough. You want to have a title search conducted and have a professional title agent or closing attorney conduct the closing. Title insurance is typically based upon the purchase price and since you won’t be paying very much for the property the one time insurance fee won’t cost you much either. Just make sure you have a title search conducted and the title insured.
Go to the local county website and in many cases you can look up this property using their Geographic Information System which will allow you to view the property lines from a bird’s eye view. You can get a general idea of the property lines (but even the G.I.S. will remind you that these are not to be used in lieu of a survey), print this map and walk the property yourself. This will also aid you in deciding where best to place your plans for you homestead. You might, for instance, find that the barn would be better someplace else, or that a stream runs through part of the property but was so overgrown you missed it originally.
This will also give you an idea on the type of housing you can place on this property. You will want to check and see what is allowed not only by the zoning but also by the private deed covenants and restrictions. From there you can decide upon the housing that bests suits you and the property. Maybe it’s a log cabin, stick-built home, yurt, shack, tent or even that mobile home (fixed up) or a newer model.
Why not recycle your housing like you try and do everything else? In most aspects of simple living, homesteading and self-sufficiency, we seek to recycle the old to provide a new use. I would recommend that you consider repairing that used mobile home or at least consider replacing it with a more modern, used or repossessed mobile home.
Back in the 1990’s I discovered that owners of mobile homes were often abandoning homes in parks. Much like the stick-built owners of today, these mobile-home owners could not find buyers with bank financing to purchase their homes. This meant that they either had to walk away from their homes or sell for whatever cash people did have. I was able to buy 3 bedroom, 2 bath, 14 feet by 70 feet, singlewide mobile homes for $500 to no more than $3,000 cash. In many cases I was given the homes for free so that seller could move and not be responsible for paying lot rent to the park. These homes did need work but if you are buying a three bedroom, two-bath home for $500 you have a lot of room in the budget for repairs. I found out that there were people all over this country making a business out of buying these cheap singlewides in parks. My area was not some unique, cheap mobile home utopia.
Mobile homes are considered personal property unless some legal work is done to “attach” the home to the real estate. Typically this involves “retiring the title” of the mobile home. In most states, mobile homes are bought and sold using titles exactly like the one used to buy and sell cars. The registration was done at the Division of Motor Vehicles (or whatever similarly named agency your state has) just like the purchase of a car. Liens on mobile homes appear on the title just as they do on car titles. Some states vary a bit or only require titles for later model homes but the concept is the same as buying and borrowing against a car.
The cheapest alternative will, most likely, be to simply repair the mobile home that is already on the land. I have found you can repair and rehab most any old mobile home into a dollhouse. I believe these homes are much easier and far less expensive to work on than a stick-built home and since you are doing the work it can be done to standards that suit you. Trust me, if I can learn to fix these homes, anyone can.
If you choose not to repair the old trailer that is currently on the land, you might consider buying a used or repossessed mobile home a moving it to this land. Moving a mobile home is not necessarily cheap and will vary greatly by location. I live in the mountains of North Carolina with narrow, winding roads, which makes moving mobile homes a bit frightening, even to watch. The cost to move a singlewide runs about $1,500 with the mover leveling the home, setting up the home on blocks (to satisfy our local code) and strapping it with tie downs. Moving doublewides tends to cost a little more than twice the cost of a moving a singlewide because the movers have to not only move two sections of the home but also break apart the halves and put them back together again.
Once you move the home to your land you now have a home complete with doors, windows, furnace, plumbing and electrical. You may want to install skirting or a block foundation along with a deck or steps to complete the home. If you choose to remain off the grid then you are pretty much done with the home and are now ready to make your own modifications for solar, wind or whatever alternative power you may choose.
In most states that I am aware of you will find that the mobile home can remain “personal property” for tax purposes, which can dramatically lower your annual tax bill, making this option even more affordable in the long run. So not only are we purchasing a nice-sized home for less than we might pay for a used car, we are paying taxes on it as if it were a used car. Every expense and tax we save money on further frees us from our financial handcuffs.
For those of us who can’t wait to begin homesteading, the shedding of the “trailer” bias or the removal of a mobile home from the land may be the catalyst to making our homesteading dreams a reality sooner rather than later. Even if you choose not to live in a mobile home on that land permanently, it may offer you the starter house or at the very least, truly affordable land and infrastructure that will become the diamond homestead of your dreams. By doing the work yourself instead of waiting a lifetime to buy someone else’s creation, you will have the testimony of experience to carry you through the obstacles and allow you to share these skills to help others create their homesteads. Now you will be able to invite them out to your homestead and show them just how you did it.

Thursday, 5 July 2018

Nothing Simplifies Rural Life Like Fencing


Some people swear by meditation; others tout the virtues of cutting up your credit cards, or joining a cult, but for me simplifying life is all about fence.
That’s because fence is all about keeping the critters out of your garden, keeping the neighbor’s critters out of your critters, and keeping your critters off the highway. However, merely securing the food supply, staying on good terms with folks up the road, and avoiding lawsuits aren’t the only things that fencing can achieve for you. Fence can mark your property boundaries, and in certain instances even become your boundaries. Keeping these things in mind, you can see that fencing may well be the most important construction on your property.
Fence can also cost a lot of money, but it doesn’t have to. As a rule of thumb, the lower the cost, the more maintenance is required. If you have a small garden spot you want to protect, then you might not mind doing a bit of routine maintenance to keep the groundhogs out of the greens, but if you have a few hundred yards of livestock fencing adjoining a busy highway, animal, and even human lives, can depend on your ability to keep your animals off the roadway 24/7/365.
Of course there are about as many kinds of fence as there are fencing materials. (We’ve even seen a fence made out of old bicycles.) However, I’ve put together a collection of some of the more significant styles of fencing that might be of interest to the small landowner. The first group is timeless and cheap and the second group keeps your livestock out of traffic about as securely as the current state of the art allows.
Traditional Fencing
When you’re looking for ways to get by cheaply, there’s a lot to be said for looking at techniques that have been in use longer than money. Traditional fence methods make heavy use of the materials most readily at hand.
Stone
Arguably the first fencing material, stone endures in fences and walls, even if you have to replace a rock now and then. It’s easy to look at all the stone fences in Europe and New England and conclude that people these days simply don’t work as hard as they used to. That may be the case, or perhaps it’s just because stone fences can last for centuries, so there are a lot of them still around. At any rate, hard work notwithstanding, it’s a wonder to me that more landowners don’t build stone fences in places where rock is abundant.
Dry-masonry — the art of stone construction without mortar — has been practiced since before the time of the Great Pyramids. If you’ll just keep certain givens in mind, such as rain, ice, and frost-heave, you’ll find that you can, without gaining an excessive amount of education on the matter, construct rock walls that will contain sheep or cattle very well without great expense.
Although stone walls seem to be the epitome of immovable strength, they actually offer quite a bit of flexibility in that the shepherd or cattleman, rather than maintain some sort of movable gates, accesses the fields simply (or laboriously) by dismantling the wall where a gate is desired, moving the livestock from — say, the winter pasture to the summer pasture — then rebuilding the fence. When your life is measured in seasons rather than minutes, this would be a workable solution, but most applications require an easier/quicker gate than this.
Wattle
Wattle fencing is a technique so old and so simple that it has evolved independently all over the world. Over 6,000 years old, wattle fence involves placing stakes in the ground and weaving smaller branches or slats between them. It is the basis of the construction method called wattle and daub, which sounds like a Hobbit law-firm, but is actually wattle fencing covered with mud — concrete, morter, stucco, or whatever.
Wattle fence is basket-weaving in a single plane; it’s particularly handy for containing smaller animals, especially in dryer climates where the upright posts are less likely to rot in a season or two.
If you have lots of brush on your property, and a few crude tools, you can make wattle fencing for little or no cost. You’ll want to use green wood from flexible species like willow, bamboo, chestnut, or hazel for your wattle.
Split-rail
Split-rail is the fence of early America. Long-lasting, flexible in design, and effective, once you’ve done the seriously hard work of splitting the rails, you’ll have an enduring, low-maintenance fence that can be moved about according to your whims.
Rails are split from durable, straight-grained woods such as white oak or hickory. Unlike most of the photos you may have seen, log-splitting is not done with an ax, but with a splitting maul and steel wedges.
The rails are then arranged in a zig-zag pattern with a flat stone placed under each corner. Split-rail fencing has been used to contain all sorts of livestock, even boisterous, destructive, large hogs.
State-of-the-Art Modern Fencing
Traditional fencing is certainly unparalleled for low cost, but sometimes cost needs to take second place behind security, as, for example, when your pasture fronts on a busy highway. Not only are you at risk of losing your livestock, but stray animals on the roadway can easily cause an accident, placing you in considerable legal liability. Here are three types of modern fencing that can come as close to worry-free containment as you can probably hope for.
Electric Fence
It’s hard to beat a solar electric fence as a way to secure a small area. Theoretically, it needn’t be that small, as a single charger can electrify several miles of fence line. However, since the landowner needs to keep the fence from being shorted-out by weeds or fallen limbs, there is a practical limit to what can be maintained. Of course, how much maintenance is required depends on, among other things, how high off the ground the bottom wire will be. If used to keep livestock in, it doesn’t need to be that low, but if your fence is designed to keep small animals out — of the garden for example — it needs to be only two or three inches from the ground, so running a string-trimmer under the bottom line needs to be done every three or four days. A less-environmentally friendly technique would be to spray herbicide on the grass growing under the wires.
Using a solar fence charger and reusable t-posts means you can locate your fence as far from the house as you want since it makes its own electricity. I’ve had very good luck protecting my garden with three lines of hot wire: first, one about three inches off the ground, or the height of a groundhog’s nose; then another line at about eight inches off the ground, in case the ground-hog, or a rabbit, or squirrel, decide to jump the first line (although it’s true that after one bite from the fence, most critters get and stay far away from the area). Above that, around four feet from the ground, the third wire is about the height of a whitetail deer’s nose. The reason I “aim” for the nose is that the typical animal will first spy the white line of electric tape. His curiosity aroused, then he immediately moves in to investigate, which he first does by touching his nose to the hot tape. When a grown deer touches the tape, he’ll be out of sight and still running only a millisecond later, and most animals won’t be back to test the line again for a long while.
In days gone by, before electrical poly-tape was invented, steel wire was used. Wire works well enough at doing its job, but the poly-tape, besides being much easier to work with, is much more visible both to animals and humans, which is a definite benefit to both.
In case you’re wondering, electric fences are not harmful to animals as some city folks seem to think. If you want a good demonstration of this, simply grab hold of the hot wire/poly-tape yourself. You’ll find that this action will provide you with an indelible memory of your experience, yet you won’t be permanently harmed or altered in any way (other than perhaps deciding to stop taking my advice). Since the electricity comes in pulses, you’ll be able to let it go (and quite rapidly) which is another safety feature.
Once you’ve enjoyed all the direct current you need to come to this conclusion, you can test your fence in the future by pulling a blade of grass and holding it to the line. If everything is connected properly, you’ll feel a slight tingle, but not really a shock.
Welded-steel Corners and T-posts
Here’s a fence design that will contain everything from a (reasonably good-natured) 2,000-lb. bull to baby lambs. The photo below shows one strand of barbed-wire over a 48” woven-wire, but this strong framework will support any sort of wire fencing, and will last for the rest of your life in most conditions. The posts, in this case 5” steel pipe and t-posts, are driven into the ground and braces and caps are welded in place.
After the wire is stretched taut with winches or hydraulics, this results in a very strong fence.
In the past, cattle fences were made with wooden posts and fewer lines of barbed-wire. Some old fences only consisted of two strands of wire, but those were simpler times when a stray animal wasn’t that much cause for concern, and local laws tended to support free range. These days, five lines of barbed-wire is the rule for cattle fence, and six lines and up are used more and more.
Some animals are just naturally hard to fence in, particularly goats who are curious, smart, dexterous, and quite a pain when they learn the weakest points in a fence. But there’s a solution: here’s a photo of a fence that’s designed to hold in both cattle and goats. Goats are a particular problem because their tendency to climb things breaks down woven wire, so if this use of 11 strands of barbed-wire seems pricey, it is less so compared with the welded-wire fence that goats would normally require. Notice the use of rigid hog-panel to keep the goats from climbing over the stone cairn.
Of course, there are lots more types of fence. Many types are suggested by readily available materials; in the American west, where the stone is such that it’s possible, they make fence posts for barbed-wire out of long shards of the native rock. Then there are the living fences fashioned from dense, thorny growing plants like hedge-apple (Maclura pomifera) that can be maintained for generations. Whatever style or type you choose, will be a major improvement to your property, and you’ll sleep easier at night.

Wednesday, 4 July 2018

Designing Your Chicken Coop: A Work in Progress

Five years ago, my husband and I designed and built our backyard chicken coop. The design was based on photos of a friend’s chicken coop and ideas we gleaned from other online coop designs. Both of us being mechanical engineers and hands-on do-it-yourselfers, designing our own chicken coop is a pretty straightforward task. If anything, we went way beyond what was needed by modeling it in CAD with very exacting dimensions and drawings. That first design incorporated all the necessities for keeping a small flock healthy and comfortable — coop area, run area, nesting boxes, perches, doors, accommodations for food and water.
However, we found ourselves continuously tweaking the design to incorporate new features aimed at making tending our flock a little bit easier. Recently, we were asked to design and build a chicken coop for our vegetable CSA farm. We looked at our original design and all the features we added over the last five years. We also considered how we ended up with our current design because not all of those new features worked out the first time. There was some (read: a lot) of trial and error. While the chicken coop at our CSA farm benefited from our years of continuous improvements, it occurred to me that it would have been nice to incorporate some of these improvements from the start or at least know why some coops are designed a certain way.
This is by no means an exhaustive summary of all chicken-coop design consideration, but, instead, some of the things we found important to our lifestyle. With busy schedules, running our own consultancies, going to night school, and keeping neighbors content about chickens in an urban setting, these features turned out to be essential for simplifying our chicken-keeping lives. For us, things like quick cleanability, easy access to coop and run areas for servicing, sealing for pests and predators, winterization, and automation were important to us. In case of that extended vacation, we also wanted it to be uncomplicated for our neighbors to take care of the chickens. To us, that meant daily egg collection with minimal servicing needs.
Before starting on your own chicken coop design project, decide what kind of coop fits your needs. I put coop styles into three categories — tractors, stationary, and free-range.
Well, the last is not so much of a coop design, but it is a choice on how to maintain your flock. It is possible to provide minimal protection for your chickens and allow them to free range in a backyard. They will destroy any unprotected gardening and are susceptible to predators like large birds, coyotes, and even neighborhood pets. Keep in mind, chickens fly, but do not take flight. They can easily jump and flap their way over a 4–6-foot barrier. In an urban setting with coyotes and large birds near a throughway with no yard fence, free-range was not an option for us.
tractor coop is a chicken coop on wheels which is easily moved from place to place to provide chickens with a fresh patch of ground to feed and scratch in. These are great if you are looking for a way to use your chickens for aerating soil, but it is not for manicured lawns. It is tempting to build a tractor “just in case” you might want to move it, but parts that are supposed to move may no longer move after long, stationary periods out in the elements. Rubber wheels, lubricated bearings and axles can degrade from exposure causing irreversible damage. So, only build a tractor if you plan to use it and maintain it.
Stationary coops are best if you are looking for a semi-permanent structure that might be moved periodically. They lack wheels and a foundation is not necessary for a backyard flock. An open bottom gives the birds access to the ground for scratching and pecking. Most are not permanent structures and they can be moved periodically as needed. We added of four sturdy handles to allow four strong people to move the coop across the backyard with only a modest effort.


We have eight raised beds and getting a tractor onto those beds is just not practical, so we have a stationary coop. However, we do want our chickens to aerate our beds, eat vine-borer grubs, and leave some fertilizer. In addition to composting the bedding and soil, we pen our hens on each bed at the start of the season. The needs of backyard hens are pretty basic. Industrial chickens operations take this notion to an extreme, but once chickens have access to food and water with some protection from the elements and predators, the rest of the coop design is about convenience for owners. Chickens will lay eggs anywhere. The nesting area is a space to encourage chickens to lay eggs so we can easily find them. We do not walk our chickens on a leash. The run is an area where they get fresh air, scratch and peck and hunt for worms off-leash. They do not sleep in our house; the coop keeps the chickens safe at night protected from predators and elements.
We have eight raised beds and getting a tractor onto those beds is just not practical, so we have a stationary coop. However, we do want our chickens to aerate our beds, eat vine-borer grubs, and leave some fertilizer. In addition to composting the bedding and soil, we pen our hens on each bed at the start of the season.
The needs of backyard hens are pretty basic. Industrial chickens operations take this notion to an extreme, but once chickens have access to food and water with some protection from the elements and predators, the rest of the coop design is about convenience for owners. Chickens will lay eggs anywhere. T


he nesting area is a space to encourage chickens to lay eggs so we can easily find them. We do not walk our chickens on a leash. The run is an area where they get fresh air, scratch and peck and hunt for worms off-leash. They do not sleep in our house; the coop keeps the chickens safe at night protected from predators and elements.
Our original coop design is pretty straightforward. The 8’ by 4’ footprint is framed by 2”x4”s. The cuts were selected to maximize lumber usage such as completely using a 12′ board with 8’ and 4’ cuts or two 6’ cuts. The center-peaked roof uses a single sheet of plywood as do the coop and nesting walls. The nesting box was built separately with an internal frame allowing it to be screwed onto the main coop. It is divided into three 12” x 12” x 12” spaces, which is more than ample for four hens.
The run and the coop are accessed through simple hinged doors for cleaning and servicing. The nesting box is easily accessed through a hinged lid for egg collection and cleaning. The perches were made from 2”x2” fencing. We used galvanized dryer vents for coop ventilation.
We were advised that our neighborhood is frequented by coyotes, raccoons, and large predatory birds, so, we implemented several features for predator protection. To keep raccoons from reaching into the enclosure, the run was enclosed with ½” by ½” hardware cloth stapled every six inches. We gave our hens a safe, enclosed coop to sleep in and added a nested, sliding, garage door to close them in the coop at night. The garage door was manually operated with a rope and cleat requiring the coop to be closed at night and opened in the morning.
Our flock would often decide to sleep on the perches in the run. Whether this was because they could not see well enough to get into the coop or they just wanted to enjoy the fresh air, sleeping outside thwarted the multi-layered nighttime defenses from predators. So, one of the first features we added was a coop light. We simply plugged in the light at night and unplugged it when we closed the coop door.
However, given our chickens are not so interested in sleeping in, ever. We found getting up early to open the coop cut into our weekend. So, we decided to automate not only the coop door, but also the light. While we were at it, we also added a socket for a screw-in heater inside the coop. Automating the light was a simple matter of adding a mechanical timer switch. For the heater, we used a simple temperature controller. When the coop temperature drops below 40°F, the heater automatically kicks in to keep the coop warm. To automate the door, we opted to buy a commercial coop motor and timer.
Our most recent change swapped a heated waterer with an automatic waterer. The heated waterer proved to be a necessity for New England winters, but keep in mind, they need electricity. The automatic waterer simple device has a gravity activated valve and it screws into a water hose. When the waterer is full, the valve shuts off the water. As it falls low, the valve opens.
Now, the coop door opens at 6:00 AM and closes at 10:00 PM; the light turns on at sunset and off at 11:00 PM; the heat turns on at 40°F and there is a constant supply of fresh water. Of course, the automation did not get installed without a few hiccups.
On a few occasions, we found the glass infrared-heater shattered. It appears our chickens like to peck at it. We have since replaced that with a ceramic heater. We opted to build our own garage door out of wood. Wood does not slide against wood really well, so it took several adjustments and a few failure-to-opens to get it moving consistently. Wood also changes with weather and time, so there are additional tweaks with seasons. To avoid this tweaking, we will purchase a commercial door, slides, motor, and timer for our CSA farm. There are several all metal options available for this.
We only just installed the automatic waterer last month. It seems simple enough, but it did involve new valves and splitters at our water hose. We also learned there is a sweet-spot to the valve adjustment. An improperly adjusted valve causes the water to either continuously flow or never fill. I also expect winter to present some new challenges as well; freezing may send us back to the heated waterer.
Since we had not anticipated adding so much automation, the coop did not have a protected space for some of the equipment. We decided to turn one of our nesting boxes into a utility closet. The utility closet houses electrical outlets with a breaker switch and the mechanical and electrical timers. Even if you do not plan to automate your coop to this extent, you should consider how electricity may be accessed and the rules in your municipality. You might also consider options like solar panels which are also available with automated coop doors.
All that automation may sound like a lot of work, but ultimately, it simplified our lives tremendously. Not only did it allow us to get extra shut-eye, but it also made traveling easier to manage. Except for collecting eggs, the chickens no longer needed daily service.
The automation also made it easy for neighbors of all ages to take care of our chickens when we were away. As a matter of fact, it made neighbors happy to take care of our chickens when we were away. For some reason, the simple responsibility of opening the door and turning on the light made some neighbors a little nervous about caring for the chickens. What if they forget? What if they do something wrong? What if the chickens need something more? After automation, the task seemed less daunting. It was more of a daily egg treasure-hunt than a daily chicken chore.
Since kids at the CSA farm were going to be taking on the chicken chores, we realized we could make it easier to clean the coop. The indoor coop is off the ground to prevent nighttime predators from simply digging under the coop. Since the area under the coop is part of the run, the footprint is also used more efficiently. However, the best feature is the slid out floor allowing quick coop cleaning. Our original design was a framed piece of plywood that slides through the coop door (see photo). This worked great and was really simple, but cleaning was not as easy as it could be. The floor must be slide all the way out or tipped up to clean. The hidden nooks and crannies around the frame could also house pests and dirt that are hard to remove. For the new design, we opted for a piece of plywood cut to size with a grab handle. Without the frame around the edges, the floor only needs to be pulled out about a foot and the dirty coop materials are quickly swept into the run. Six-year olds are doing this.


For the nesting boxes, the stand alone internal frame design was easy to assembly, but it created a low wall between the coop and the nesting boxes. This is not a big deal, but it does trap some material in the nesting boxes during cleaning. The new coop was made with an external frame and a slanted floor. This eliminated the low wall and allows the nesting material to be easily swept into the coop for cleaning.
The final improvement we made for the cleanability of our coop was sealing the interior surfaces better. We found out the hard way how many little critters can build a home in every nook and cranny inside the coop. And during a cold winter, a warm coop is a very attractive place for a critter to squat. Last winter brought on a pretty nasty mite invasion in our coop and ultimately, on our chickens. After a deep cleaning in the coop to rid it of mites, we added generous coating polyurethane to all surfaces and caulked all corners with silicone. This generous coating of polyurethane and well sealed corners now allows us to periodically hose out the whole thing.
Now, cleaning the coop and feeding the chickens takes around 20–30 minutes a week. Additionally, since it is so easy to clean the coop, we do it more often and more thoroughly. This keeps infestations at bay and our chickens healthier. The cleanliness and lack of smell also keeps our neighborhood happier.
On somewhat of a whim, we built a chicken coop and bought a small flock of chickens five years ago. It has been a lot of fun and a great learning experience. As you can see, it is an ever-evolving process, but each new improvement makes keeping chickens a seamless part of our life except we get much tastier eggs for it!